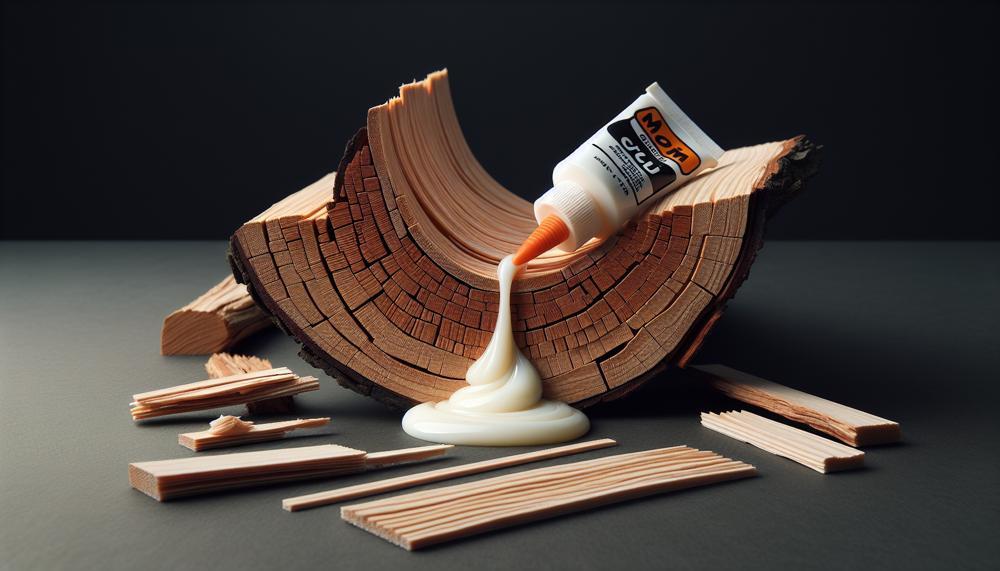
Are you knee-deep in a home renovation project? Do you need to secure rubber flooring onto a wooden surface? Gluing rubber to wood is an easy and effective solution. It creates a sturdy and long-lasting bond.
In this blog post, we’ll walk you through the step-by-step process of gluing rubber to wood. We’ll cover important aspects such as:
- Selecting the perfect adhesive for the job
- Preparing the surfaces for optimal bonding
- Applying the adhesive with precision
- Allowing sufficient curing time for maximum strength
So, get your materials ready because we’re about to show you how to glue rubber to wood like a pro.
Table of Contents
Understanding Adhesives
When considering the best types of adhesives for bonding rubber to wood, several factors are important. These include compatibility, strength, and surface area.
After extensive research, it has been determined that contact cement, cyanoacrylate adhesive (super glue), and polyurethane-based adhesive are the most effective options for creating a strong bond between these two materials.
| Adhesive Type | Pros | Cons |
| Contact Cement | – Creates a permanent bond – Activated by pressure and heat – Suitable for large surface areas |
– Requires precise alignment – Produces strong odor – Can be toxic if inhaled or ingested |
| Cyanoacrylate Adhesive (Super Glue) | – Quick-drying – Easy to use – Ideal for small surface areas – Strong bond on rubber surfaces |
– Not suitable for large surface areas – May not work on all types of rubber – Can irritate skin and eyes |
| Polyurethane-based Adhesive | – Strong bond – Resistant to heat, water, and chemicals – Flexible when dry – Suitable for both small and large surface areas |
– Requires precise alignment – Longer curing time compared to other adhesives – Can be messy to use |
Properly preparing the surfaces before applying any adhesive is important. This ensures a strong bond. This includes cleaning with solvents. It also involves lightly sanding the wood surface to remove any roughness. It is also crucial to carefully follow the manufacturer’s instructions. Use the appropriate adhesive for the specific materials being used.
Preparation Before Gluing
Proper surface preparation is crucial. It ensures a strong, long-lasting bond between rubber and wood. Before gluing them together, it is essential to clean the surfaces. Create a rough texture and apply a primer. Follow these necessary steps to prepare both surfaces before bonding:
- Cleaning the surfaces: Thoroughly clean the surfaces to remove any dirt, dust, or oils that may hinder proper adhesion. Use mild soap and water for the wood surface and a degreaser for rubber. Ensure the surfaces are completely dry before proceeding.
- Sanding the wood: Lightly sand the wood surface with fine-grit sandpaper to create a rough texture. This will help the glue adhere better to the wood.
- Roughening the rubber: Similar to sanding wood, you need to create a rough texture on the rubber surface as well. You can use sandpaper or a wire brush, but be careful not to damage the rubber.
- Applying a primer: For a stronger bond, consider applying a primer on both surfaces before gluing them together. There are primers specifically designed for bonding rubber to wood, readily available at hardware stores. Follow the instructions carefully and allow it to dry completely before moving on to the next step.
By following these necessary steps, you can ensure that both surfaces are clean and have a rough texture for optimal adhesion. Additionally, using a primer can further enhance the bond between rubber and wood.
Both surfaces are prepared. Now, apply the adhesive and bond the two materials.
Application Process
When adhering rubber to wood using glue, keep a few important things in mind. This will ensure a successful bond. First, proper surface preparation is key. This includes thoroughly cleaning and sealing both the rubber and wood surfaces. Then, apply adhesive.
Additionally, choosing the right type of glue for this task is crucial. Some adhesives may work better on certain types of rubber or wood. It is important to carefully read the manufacturer’s instructions and choose accordingly.
Patience is also important when working with glue and rubber. It’s essential to give the adhesive enough time to properly dry and form a strong bond between the materials. This may require following specific instructions or using activators for longer-curing adhesives.
Ultimately, taking the time to properly prepare surfaces can make all the difference. Choosing the right adhesive is crucial too. This is when it comes to successfully adhering rubber to wood.
Types of Rubber and Wood
Rubber and wood are commonly used for gluing. Each has unique properties and characteristics. These materials include:
- Rosewood: This type of hardwood is highly valued for its stunning appearance and density, making it a top choice for furniture, musical instruments, and decorative items. However, due to its scarcity and endangered status in certain regions, it is pricier and less readily available compared to other wood options.
- Rubber Wood: This light-colored hardwood is frequently used in furniture, flooring, and construction. It is considered more environmentally friendly than Rosewood due to its sustainable sourcing from rubber tree plantations primarily located in Southeast Asia.
- Engineered Woods: This category includes plywood and pressboard, which are created by binding layers of wood veneers with adhesives. They are often chosen for their strength and durability in construction and furniture making.
- Oriented Strand Board (OSB): This engineered wood product is made by compressing layers of wood strands with adhesives. It is commonly utilized as a structural material in construction.
- Other Types of Rubber: Along with natural rubber, there are also synthetic rubbers like neoprene, silicone, and butyl rubber that are widely used for various applications.
Bonding and Curing
When bonding rubber to wood, the process requires careful consideration of various factors to ensure a strong and durable bond.
This includes selecting the right adhesive, preparing the surfaces properly, applying the adhesive accurately, and allowing for sufficient curing time.
Choosing the right adhesive:
Selecting the appropriate adhesive is crucial when bonding rubber to wood. It is essential to choose an adhesive that is compatible with both materials. The adhesive should be specifically designed for this type of application.
Some common options include cyanoacrylate glue, contact cement, polyurethane glue, epoxy, and rubber cement.
Preparing the surfaces:
Proper surface preparation is key to achieving a strong bond between rubber and wood.
This involves thoroughly cleaning both surfaces. Then, sand the wood to create a rough surface for the adhesive to adhere to.
Applying the adhesive:
Once the surfaces are prepared, a thin layer of adhesive should be applied to one surface.
Precise alignment of the surfaces is critical to ensuring a strong bond. Apply pressure to the surfaces. Let them dry completely before releasing.
Allowing for curing time:
Curing time varies depending on the type of adhesive used. It is important to follow the manufacturer’s instructions. Allow enough time for the adhesive to fully cure before handling or putting any stress on the bond.
Post-application procedures:
To further protect the bond from environmental factors such as moisture, it may be necessary to seal it with silicone caulk or apply a hardener.
These additional steps help maintain a strong and durable bond over time.
Post Application Procedures
When using glue on rubber and wood surfaces, follow these recommended steps to ensure a durable and long-lasting bond.
- Clean the surfaces: Before applying any glue, it is essential to thoroughly clean both the rubber and wood surfaces. A degreasing agent can effectively remove any oils, dirt, or debris that may hinder the bonding process.
- Sand the surfaces: To create a rougher texture for better adhesion, lightly sand both surfaces.
- Choose the right adhesive: It is crucial to use an adhesive specifically designed for bonding rubber and wood. Polyurethane glue, also known as Gorilla Glue, is a popular choice for this type of bonding.
- Apply the adhesive: Carefully follow the instructions for the adhesive and apply a thin, even layer onto both surfaces using a brush or spatula.
- Clamp the surfaces: For a stronger bond, firmly clamp the rubber and wood surfaces together. It is recommended to use clamps specifically designed for woodworking projects.
- Allow for curing time: The adhesive requires time to cure completely before handling or using the bonded surfaces. This typically takes between 24-48 hours, depending on the type of adhesive used.
- Protect against environmental factors: Once the bond has cured, it is crucial to protect it from environmental factors such as water, heat, or extreme temperatures. Applying a sealant or protective coating can help prevent damage and maintain the strength of the bond.
Troubleshooting and Maintenance
When working with adhesives, it is important to properly maintain and store them. This prevents them from drying out or becoming unusable.
Here are some tips to help you keep your adhesive in good condition while gluing rubber to wood.
| Store in a cool and dry place | Use airtight containers or tightly seal the original packaging | Keep adhesives upright or consider storing upside down |
| Choose the right solvent or thinner recommended by the manufacturer | Follow proper maintenance procedures | – Clean container before and after use – Tighten lids securely – Store in suitable conditions |
| Avoid using expired adhesives; always check expiration dates before purchasing or using them |
To ensure optimal performance and prevent adhesives from drying out, store them in a cool and dry place. Keep them away from extreme temperatures and humidity. This will help maintain the proper consistency and effectiveness of the adhesive.
Minimizing air exposure is crucial in preventing adhesives from drying out. Using airtight containers or tightly sealing the original packaging after each use can help achieve this. Additionally, storing adhesives upright or upside down, depending on the type, can also minimize air exposure. It can also prevent leaks.
You can adjust the consistency and drying time of adhesives by using the right solvent or thinner, as recommended by the manufacturer. It is important to follow proper maintenance procedures. For example, you should clean the container before and after use, tighten lids securely, and store in suitable conditions.
Expired adhesives should be avoided at all costs as they may not have the same bonding strength and could result in a weak bond between rubber and wood surfaces. Always check expiration dates before purchasing or using adhesives to ensure optimal performance.
DIY Projects and Uses
Gluing rubber to wood can unlock a world of possibilities for imaginative and practical DIY projects. You can create custom stamps or non-slip surfaces. You can also add rubber grips to your wooden tools. Using the right adhesive and techniques ensures a strong, lasting bond between the two materials.
One popular DIY project that involves bonding rubber to wood is creating personalized stamps. With just some rubber and a wooden block, you can effortlessly make your own unique stamps for scrapbooking, card making, or art projects. Using a strong adhesive such as contact cement or polyurethane glue will guarantee that the rubber stamp stays securely attached to the wooden block, even with frequent use.
Another practical project is attaching rubber grips to wooden handles of hammers or screwdrivers. This not only provides a more comfortable grip but also reduces the likelihood of the tool slipping out of your hand while in use. Super glue or contact cement are both excellent options for this type of project. They form a robust bond that can withstand the stress and pressure of regular use.
For a distinctive and trendy addition to your home decor, consider crafting a rubber mat by gluing foam rubber to a wooden frame. This can be used as a doormat or even as a decorative piece under furniture. Use contact adhesive to join foam rubber to wood. It allows for flexibility and movement between the two materials.
To ensure a durable bond between rubber and wood in any of these projects, it’s essential to properly prepare the surfaces. This will ensure the bond endures. Also, select the right adhesive. Cleaning and sanding the surfaces before applying the adhesive will help create a stronger bond.
It’s also crucial to follow the manufacturer’s instructions for applying the adhesive. Allow enough time for it to cure before using the bonded object.

Conclusion
Gluing rubber to wood is a simple yet effective solution. It achieves a strong and long-lasting bond between these two materials.
Follow the steps in this blog post. You can easily elevate your wooden tools or furniture. Secure rubber flooring onto a wooden surface during a home renovation project.
When gluing rubber to wood, remember to select the right adhesive, properly prepare the surfaces, apply the adhesive accurately, and allow sufficient curing time for maximum strength.
Furthermore, understanding the different types of rubber and wood materials can help you make an informed decision when choosing the appropriate materials for bonding.


