Entering the world of crafting has the power to turn common materials into amazing works of beauty.
Sand to wood adhesive is one of the many methods that hobbyists and experts may use, and it is particularly popular because of how easy it is to use and the distinctive texture it adds to products.
With this unique method, your designs get a tactile dimension as well as a flexible look that may evoke the feel of soil or natural landscapes.
We will go into the specifics of properly securing sand to wood in this blog article, including the advantages and important factors to take into account.
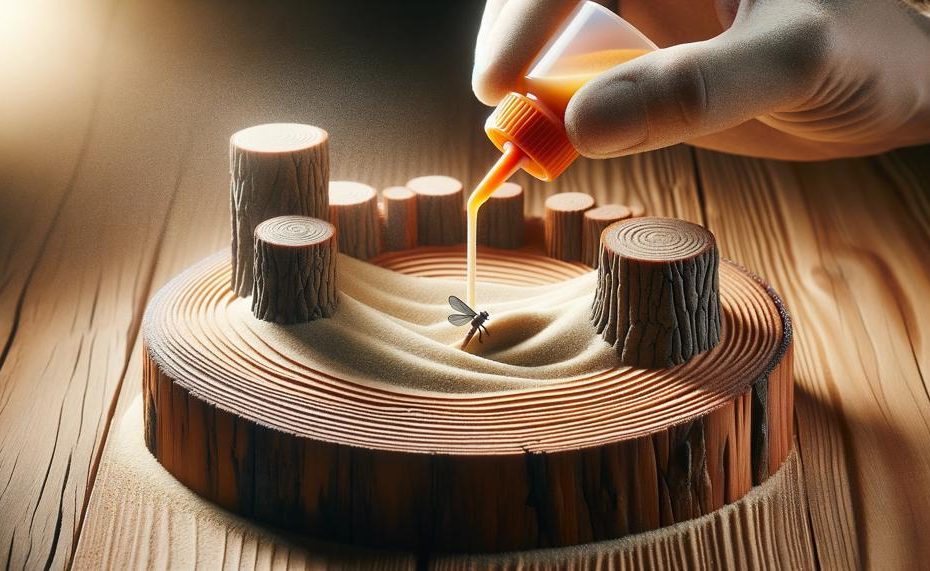
So, can I glue sand to wood?
Yes, you can glue sand to wood to make a surface less slippery. Here’s one way to do it:
- Seal the wood
- Sand it smooth
- Apply a coat of high-quality urethane
- Sand again after the urethane dries to create a dull surface
- Lightly sprinkle sand onto the wet surface while applying a second coat
You can use white glue, like school glue or tacky glue, to glue sand to wood. The white glue will dry clear, leaving the sand texture visible. However, you should avoid adding too much sand, or the mixture will become more spackle-like and less glue-like.
You can also use neoprene glue, which can hold tightly and move with seasonal wood movement.
Let’s dive in and explore how this simple yet effective technique can elevate your crafting projects to the next level.
Table of Contents
- 1 Understanding the Nature of Sand and Wood
- 2 Factors to Consider When Gluing Sand to Wood
- 3 Using Epoxy Resin to Glue Sand to Wood
- 4 Applying the Sand onto the Wet Adhesive
- 5 Allowing the Epoxy Mixture to Cure and Harden
- 6 Utilizing Construction Adhesives for Bonding Sand to Wood
- 7 Pressing the Sand onto the Adhesive
- 8 Curing Times for Construction Adhesives
- 9 Conclusion
Understanding the Nature of Sand and Wood
Understanding the nuanced characters of both sand and wood uncovers why marrying the two with glue presents a challenge.
Sand, with its gritty texture, comprises countless fine particles, while wood is inherently porous, boasting a network of fibers and grains.
These distinct attributes demand specific considerations for adhesion.
| Property | Sand | Wood |
|---|---|---|
| Texture | Fine and granular, slipping easily through fingers. | Porous with visible grains and fibers. |
| Surface Area | High, due to tiny individual grains. | Varies, generally lower compared to sand. |
| Moisture Content | Can vary, potentially affecting adhesive properties. | Presence of natural oils and moisture can hinder adhesion. |
| Absorption Rate | Low; does not absorb glue, leading to weak adhesion. | High; absorbs glue, which can weaken external bond strength if not properly sealed. |
| Preparation Required | Needs to be clean and dry for optimal bonding. | Surface cleaning and sometimes sanding are necessary for better glue grip. |
To achieve harmony between these contrasting elements, choosing the right adhesive is paramount. PVA glue, although popular for many crafts, may not offer the strength required to bond sand’s fine particles to wood’s uneven surface.
Epoxy and polyurethane glues, known for their robust bonding capabilities, emerge as more suitable candidates. They cater to the intricate needs of both materials: penetrating wood’s pores while enveloping sand grains to create a durable bond.
Preparation plays a crucial role as well. Ensuring the wood is immaculate and slightly roughened can improve adhesion, while applying sand in a controlled manner (e.g., via sieving) helps achieve a uniform texture.
Factors to Consider When Gluing Sand to Wood
When attempting to glue sand to wood, various elements play crucial roles in ensuring a robust and lasting bond. Understanding these factors can turn an intriguing idea into a tangible, enduring creation.
Choice of Adhesive:
Epoxy glue and construction adhesives are the top picks. Their ability to adhere to both rough and porous surfaces makes them ideal for this unique combination.
Type of Wood:
The wood’s nature—whether softwood, hardwood, or treated—can influence the adhesive’s effectiveness. Selecting a suitable adhesive that matches the wood’s properties is essential.
Surface Preparation:
A clean, dry, and slightly roughened surface can enhance adhesive bonding. Sanding the wood lightly and cleaning it from dust or oils is advisable.
Adhesive Application:
Even and thorough application ensures maximum contact between sand and wood. Following the correct mixing and application instructions is critical for the adhesive’s performance.
Curing Environment:
A stable environment with adequate ventilation aids in the proper curing of the adhesive, ensuring a durable bond.
Sealant and Topcoat Application:
Applying a sealant or topcoat can protect the glued sand from wear and tear, enhancing the longevity of the bond.
Regular Maintenance:
To maintain the aesthetic and integrity of the glued sand on wood, regular cleaning and care are recommended.
Using Epoxy Resin to Glue Sand to Wood
Epoxy resin acts as a powerful adhesive to bond sand to wood due to its unique properties and application techniques. Below is an explanation of how this process works effectively:
Preparation and Application:
- Surface Preparation: The wood surface needs to be clean, dry, and roughened for the epoxy to adhere properly. This is usually achieved through sanding.
- Mixing Epoxy: Epoxy resin comes in two parts: resin and hardener. They must be mixed thoroughly in the correct ratio for the chemical reaction to occur, leading to hardening.
- Application: The mixed epoxy is applied evenly over the wood surface. Then, sand is sprinkled over the wet epoxy, ensuring full coverage.
Curing Process:
Epoxy resin undergoes a chemical reaction between the resin and hardener, leading to hardening and bonding with the sand and wood surface. This process is called curing.
Advantages of Epoxy Resin for Bonding Sand to Wood:
- Durability: Forms a strong, long-lasting bond.
- Water Resistance: Offers protection from moisture and water damage.
- Aesthetic Finish: Provides a clear, glossy finish enhancing the visual appeal.
Best Practices for Effective Bonding:
- Adequate Mixing: Ensure the epoxy resin and hardener are mixed well.
- Proper Ratios: Follow manufacturer’s instructions for resin-to-hardener ratio.
- Even Application: Apply epoxy evenly to avoid uneven textures.
Recommended Materials and Tools:
| Material/Tool | Use | Notes |
| Waterproof Sandpaper | Surface Preparation | Creates a texture for better adhesion. |
| Epoxy Resin and Hardener | Adhesive | Must be mixed thoroughly. |
| Protective Gear | Safety | Gloves and mask to avoid irritation and inhalation. |
Applying the Sand onto the Wet Adhesive
To evenly and securely apply sand onto wet adhesive when gluing it to wood, consider these techniques:
Using a Paintbrush:
A soft-bristled paintbrush is perfect for spreading sand over adhesive. It offers precision and avoids surface damage.
Spreading Technique:
- Dip the brush in sand.
- Gently brush over the adhesive in one direction.
Using a Spatula or Putty Knife:
Ideal for large surfaces, a spatula or putty knife evenly spreads adhesive, then sand.
Spreading Technique:
- Spread adhesive evenly.
- Sprinkle sand, then lightly press with the spatula.
Using a Toothpick or Skewer:
For detailed work, a toothpick or skewer gives precise control.
Application Technique:
- Dip in adhesive.
- Apply to area, then add sand.
Quick Tips for Best Results:
- Act swiftly to prevent adhesive from drying.
- Use high-quality adhesive suitable for the wood type.
- Consider sealing the sand with a topcoat.
| Technique | Tool | Best For |
| Brushing | Soft-bristled Paintbrush | Precision and fine finishes |
| Spreading | Spatula/Putty Knife | Larger surfaces |
| Detailing | Toothpick/Skewer | Small areas or intricate designs |
Allowing the Epoxy Mixture to Cure and Harden
Allowing the epoxy mixture to cure and harden is a pivotal step when gluing sand to wood, ensuring a robust and lasting bond.
The cure time for epoxy can vary depending on several factors including the specific product used, ambient temperature, and humidity.
| Initial Cure Time | Handling Strength | Full Cure Time |
| 7 hours | 12-18 hours | 24-72 hours |
| Notes: | While the epoxy may feel dry to the touch and capable of being moved or gently handled within the first 12-18 hours, it’s imperative to wait for the full cure time to achieve optimal strength and adhesion. | |
It’s essential to let the epoxy work its magic and not rush the process. Rushing could lead to a weaker bond, making your work less durable over time.
While the initial cure phase allows the epoxy to harden enough for light handling, it’s during the full cure phase that the chemical reactions complete, imbuing the bond with its full strength.
Utilizing Construction Adhesives for Bonding Sand to Wood
When you’re looking to bond sand to wood, the choice of adhesive is not something to be taken lightly.
You need a glue that’s not just going to stick around for a tea party but will hold up against the rigours of time, weather, and the odd accidental nudge.
| Type of Adhesive | Key Features | Best For |
| Polyurethane Adhesives | Waterproof, withstands extreme temperatures, longer curing time for precise positioning | Indoor and outdoor projects needing a durable bond |
| Epoxy Adhesives | Strong bond, water and heat resistant, shorter working time | Quick projects where a robust bond is critical |
| Construction Adhesive Sealants | Bonding and sealing capabilities, resistant to water and weathering | Outdoor projects requiring durability and weather resistance |
| All-Purpose Adhesives (PVA) | Quick drying, strong bond, easy to use | Less demanding indoor projects |
| Contact Cement | Creates bond when two surfaces are pressed together, suitable for woodworking | Projects needing immediate bond without clamps |
For those daring souls venturing into the world of sand and wood art, remember, the devil’s in the details. Polyurethane adhesives and epoxy adhesives are your heavy hitters, offering a fist of iron in a velvet glove – tough yet manageable. They’re the ones you turn to when you need something as stubborn as a mule.
For those creations braving the elements outside, construction adhesive sealants step up, acting as both shield and sword, bonding while battling the onslaught of weather.
Pressing the Sand onto the Adhesive
To properly press sand onto the adhesive when gluing sand to wood, one must tread lightly but with purpose, akin to the careful steps of a craftsman ensuring every grain finds its place. This process, while seemingly straightforward, requires attention to detail and a gentle hand.
The joy of creation lies not just in the result but in the doing, and here’s how to do it just right:
Preparation:
- Select your sand: Finer sands adhere more easily, offering a smooth finish, while coarser grains provide texture.
- Clean your wood: Ensure the surface is free of dust and oils. A clean canvas is key.
- Choose your adhesive: Based on the previous section, PVA for an indoor piece, polyurethane or epoxy for durability, and consider the drying time.
Application:
- Spread the glue: With a flat tool, apply a thin, even layer. Imagine you’re painting a sunrise, where every stroke matters.
- Sprinkle the sand: Whether by hand or sieve, let the sand cascade over the glue like the first snowfall of winter. Ensure even coverage for a uniform texture.
- Press the sand: Gently press the sand into the adhesive without disturbing its placement. Use a flat object or your hands, covered in a thin plastic sheet, to lightly press down, ensuring all grains make contact with the adhesive.
Drying:
- Follow the adhesive’s recommended drying time, patience here is your ally.
Sealing (Optional):
- After drying, apply a sealant to protect and enhance the sand’s color. It’s like adding a frame to a masterpiece.
Care:
- Keep your sand-adorned wood piece away from direct sunlight and high humidity to maintain its integrity.
Table of Techniques:
| Step | Method | Tips |
| Clean Surface | Wipe with a damp cloth | Avoid oils or harsh chemicals |
| Apply Adhesive | Even, thin layer | Use a flat tool for spreading |
| Add Sand | Hand/sieve sprinkle | Even coverage is crucial |
| Press Sand | Gentle pressure | Use plastic sheet for uniformity |
| Dry and Seal | Follow adhesive’s time; apply sealant | Patience ensures durability |
Curing Times for Construction Adhesives
When it comes to bonding sand to wood with construction adhesive, understanding the curing time is crucial for achieving a strong and durable bond.

The curing process isn’t just about waiting; it’s about ensuring that the adhesive has transformed from a liquid or paste into a solid state, anchoring your materials firmly together.
Curing Times for Construction Adhesives
| Factor | Impact on Curing Time | Typical Curing Time |
| Temperature | Warmer temperatures accelerate, cooler temperatures decelerate. | Shorter in warmth, longer in cold. |
| Humidity | High humidity prolongs, low humidity shortens. | Varies with local conditions. |
| Type of Adhesive | Different formulations affect drying. | Check product specifics. |
Gluing sand to wood is a unique endeavor. The adhesive acts not just as a glue but also as a sealer for the sand, ensuring it sticks and stays put, simulating a shoreline captured in time. Given this, the curing time is essential for the adhesive to perform both tasks effectively.
Based on the factors above, the general rule is that it typically takes around 24 hours for construction adhesive to fully cure when gluing sand to wood. However, this is a ballpark figure. If you’re working in a garage that’s more like a sauna or a chilly basement, curing times can extend beyond the 24-hour mark. In the same breath, different adhesives might throw you a curveball – some might be ready overnight, while others ask for a bit more patience.
For a robust bond and a flawless finish, it’s pivotal to skim through the manufacturer’s guidelines that accompany your adhesive of choice. These instructions are your roadmap, offering specific insights into application techniques, drying times, and optimal conditions for use.
Conclusion
Sand and wood crafting is more than just a straightforward hobby; it’s a sophisticated ballet of texture, robustness, and imagination. The skill of applying sand to wood involves more than just creating a connection; it also involves creating a narrative of texture, toughness, and beauty. From choosing the appropriate adhesive (epoxy’s strength or polyurethane’s adaptability) to getting the wood canvas ready, there are many technical and creative factors to take into account.
The careful selection of sand, regardless of its coarseness or fineness, and the preparation of the wood surface—both essential for a strong bond—embodiment the painstaking character of this profession. This is a purposeful act of creation rather than a random undertaking, with every brushstroke and particle of sand adding to a greater story.
An important part of this story is selecting the right glue, which comes in a variety of forms. Polyurethane adhesives are flexible and resistant to weather, while epoxy adhesives are strong and waterproof. The application technique also determines how the tale develops, from the uniform application of glue to the delicate pressing of sand, making sure that each little element adds to the finished masterpiece.
Sealing the deal, so to speak, using a topcoat or sealer improves and preserves the work, making sure it endures over time. From the adhesive’s drying process to the piece’s meticulous upkeep, this is a patient process that serves as a reminder that great art demands patience and time in addition to expertise.