Yes, bricks can be glued together, and it’s not just a modern myth. This method is gaining popularity for various projects, from intricate garden paths to robust retaining walls. Imagine being able to construct a sturdy, aesthetically pleasing brick structure without the mess and hassle of traditional mortar. This technique offers a convenient and reliable alternative for DIY enthusiasts and professional builders alike.
Gluing bricks together involves using specialized adhesives designed for masonry. These adhesives provide strong bonds, ensuring the bricks stay firmly in place for years. Whether you’re creating a decorative feature or a structural component, properly applying glue can result in a durable and clean finish.
Here are the key takeaways for successfully gluing bricks together:
- Choose the Right Adhesive: Use a masonry adhesive that is specifically designed for bricks and outdoor use.
- Prepare the Surface: Clean the bricks thoroughly to remove any dust or debris that might hinder the bonding process.
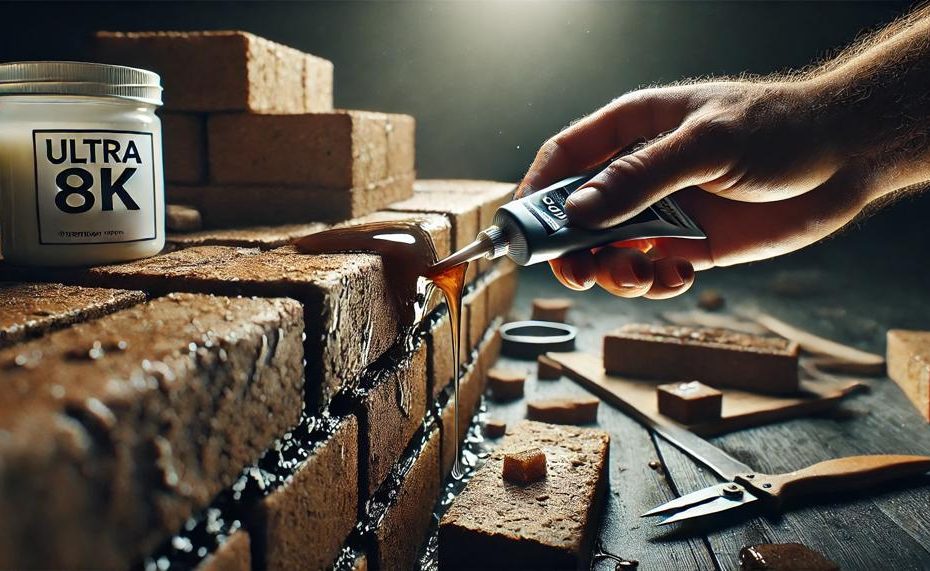
- Apply Evenly: Spread a thin, even layer of glue on one side of the brick, ensuring it doesn’t spill over the edges.
- Align Correctly: Carefully position the bricks together and press firmly to ensure a strong bond.
- Allow to Dry: Give the glued bricks ample time to dry completely before applying any load or handling them further.
Embrace the simplicity and efficiency of gluing bricks, transforming your construction projects with ease and precision.
Table of Contents
- 1 Masonry Glue vs Mortar: Understanding the Differences
- 2 Brick Adhesive Guide: Selecting the Right Product
- 3 Bonding Bricks DIY: Step-by-Step Application Process
- 4 Masonry Glue Tips for a Flawless Finish
- 4.1 Select the Right Adhesive Choose a masonry glue suitable for your project. For outdoor applications, ensure the adhesive is waterproof to withstand moisture. Adhesive Type Use Properties Polyurethane-Based General masonry work Strong, durable, weather-resistant Epoxy-Based Heavy-duty applications High bond strength, resistant to chemicals Silicone-Based Waterproofing Flexible, waterproof Prepare the Surface Ensure the bricks are clean and dry. Remove any dust, dirt, or loose particles using a wire brush or compressed air. Apply the Glue Correctly Use a caulking gun for even application. Apply a thin, consistent layer of glue to one side of the brick. Avoid excessive glue to prevent overflow and mess. Align Bricks Properly
- 4.2 Pressure and Secure
- 4.3 Curing Time Allow sufficient curing time according to the manufacturer’s instructions. Typically, this ranges from 24 to 48 hours. Avoid disturbing the bricks during this period. Finishing Touches
- 5 Advanced Bricklaying Adhesive Techniques
- 6 Troubleshooting: Solutions to Common Brick Bonding Issues
- 7 Conclusion
Masonry Glue vs Mortar: Understanding the Differences
When it comes to bonding bricks, choosing between masonry glue and mortar can significantly impact your project’s success. Here are the main differences:
| Aspect | Masonry Glue | Mortar |
| Composition | Polyurethane-based adhesive, ready-to-use | Mixture of cement, sand, and water, needs mixing |
| Curing Time | 2-7 days | Up to 28 days |
| Application | Repairs and small pieces, lightweight items | Structural applications, building walls or driveways |
| Strength | Less strong, suitable for non-structural uses | Stronger, suitable for load-bearing structures |
| Drying Requirements | Quick-drying, waterproof | Needs to stay wet for 48 hours to cure properly |
| Ease of Use | No mixing required, apply directly | Requires precise mixing with water |
| Best For | Small repairs, decorative stone, non-load bearing applications | Building structures, fences, driveways, load-bearing walls |
Masonry glue, a polyurethane-based adhesive, is ideal for small repairs and decorative projects due to its quick drying and easy application. It’s less strong than mortar and not suitable for structural applications. Mortar, on the other hand, is a mixture of cement, sand, and water that needs precise mixing and longer curing time. It’s highly durable, making it perfect for building walls, driveways, and other load-bearing structures.
Brick Adhesive Guide: Selecting the Right Product
When selecting a brick adhesive, several key factors come into play to ensure the best results for your project. These considerations will help you choose the most suitable adhesive for your specific needs:
Strength
:
- The adhesive’s load-bearing capacity is crucial. For structural projects, opt for a stronger adhesive, while lighter tasks can use standard masonry glue.
Indoor/Outdoor Use
:
- Ensure the adhesive is appropriate for the environment. Outdoor adhesives need to withstand weather conditions, while indoor adhesives focus on bonding strength and compatibility with indoor materials.
Flexibility
:
- Flexibility is vital for applications subject to movement or temperature variations. Flexible adhesives prevent cracking and ensure long-lasting bonds.
Surface Texture
:
- The texture and porosity of the brick surface affect adhesion. Some adhesives are better suited for smooth surfaces, while others excel on rough, porous bricks.
Curing Time
:
- Consider the time required for the adhesive to set and fully cure. Quick-setting adhesives are ideal for small projects or repairs, while longer curing times might be necessary for larger constructions.
Chemical Compatibility
:
- Ensure the adhesive is chemically compatible with the brick and any other materials involved. This prevents potential reactions that could weaken the bond.
Factors to Consider in Brick Adhesive Selection
| Factor | Importance | Considerations |
| Strength | High | Load-bearing capacity for structural integrity |
| Indoor/Outdoor Use | High | Weather resistance for outdoor use; bonding strength for indoor |
| Flexibility | Medium | Prevents cracking due to movement or temperature changes |
| Surface Texture | Medium | Adhesion quality on smooth vs. rough surfaces |
| Curing Time | Medium | Time required for setting and full strength |
| Chemical Compatibility | Medium | Prevents adverse reactions with materials |
Bonding Bricks DIY: Step-by-Step Application Process
To successfully bond bricks together, you need the right materials and tools. Here’s a detailed list:
| Materials | Explanation |
| Strong adhesive | Construction adhesive or masonry glue for a firm bond. |
| Clean and dry bricks | Ensures better adhesion and stability. |
| Water | Used for cleaning the bricks and mixing with some adhesives. |
| Safety equipment | Includes safety goggles, gloves, dust mask, and knee pads for personal protection. |
| Tools | Explanation |
| Wire brush | For cleaning dirt and debris off the brick surfaces. |
| Trowel | Used to apply adhesive evenly on the bricks. |
| Level | Ensures bricks are aligned correctly. |
| Bucket | For mixing adhesive if necessary. |
| Brush | For applying water and cleaning bricks. |
| Measuring tape | Helps in accurate placement of bricks. |
Step-by-Step Application Process:
- Clean the Bricks: Use a wire brush to remove any dirt, dust, or debris from the brick surfaces. This ensures better adhesion.
- Assess Brick Condition: Check for any damages and make necessary repairs before bonding.
- Select Adhesive: Choose a high-quality adhesive designed specifically for bricks. Cement-based, epoxy-based, or polyurethane-based are common options.
- Apply Adhesive: Using a trowel, apply the adhesive evenly in a zigzag pattern on the surfaces to be joined.
- Press Bricks Together: Firmly press the bricks together and hold them until the adhesive starts to set.
- Allow for Curing: Let the adhesive cure completely as per the manufacturer’s instructions before handling the bricks.
- Check Alignment: Regularly check the alignment of the bricks and apply additional pressure if needed during the curing process.
Tips for Successful Bonding:
- Choose the Right Adhesive: Ensure the adhesive suits your project requirements.
- Follow Instructions: Adhere to the manufacturer’s application methods.
- Safety First: Always use safety equipment to protect yourself during the process.
- Optimal Adhesive Amount: Use the right amount of adhesive to avoid weak bonds.
Masonry Glue Tips for a Flawless Finish
Select the Right Adhesive
Choose a masonry glue suitable for your project. For outdoor applications, ensure the adhesive is waterproof to withstand moisture.
Adhesive Type
Use
Properties
Polyurethane-Based
General masonry work
Strong, durable, weather-resistant
Epoxy-Based
Heavy-duty applications
High bond strength, resistant to chemicals
Silicone-Based
Waterproofing
Flexible, waterproof
Prepare the Surface
Ensure the bricks are clean and dry. Remove any dust, dirt, or loose particles using a wire brush or compressed air.
-
Apply the Glue Correctly
-
Use a caulking gun for even application.
- Apply a thin, consistent layer of glue to one side of the brick.
-
Avoid excessive glue to prevent overflow and mess.
Align Bricks Properly
Position the bricks immediately after applying the glue. Align them carefully to ensure a straight, level finish. Use spacers if necessary to maintain uniform gaps.
Pressure and Secure
Press the bricks together firmly. Use clamps or weights to keep them in place while the glue cures, ensuring a strong bond.
Curing Time
Allow sufficient curing time according to the manufacturer’s instructions. Typically, this ranges from 24 to 48 hours. Avoid disturbing the bricks during this period.
Finishing Touches
-
Inspect the joints for any gaps or unevenness.
- Fill in any gaps with additional adhesive if needed.
- Smooth the surface with a damp cloth before the glue fully cures for a seamless finish.
Advanced Bricklaying Adhesive Techniques
Advanced bricklaying adhesive techniques involve selecting the appropriate adhesive type and applying it with precision to ensure a strong, durable bond between bricks. Here are some advanced methods:
Using Polyurethane Adhesive
:
-
Preparation: Clean the bricks thoroughly to remove dust and debris.
-
Application: Use a trowel or caulking gun to apply the adhesive.
-
Bonding: Press bricks firmly together and allow 24 hours for curing.
-
Advantages: Known for strength and durability.
Using Epoxy Adhesive
:
-
Preparation: Ensure bricks are clean and moisture-free.
-
Mixing: Combine the two components as per manufacturer’s instructions.
-
Application: Apply the mixture with a trowel or caulking gun.
-
Bonding: Press bricks together and allow to cure for 4-6 hours, although 24 hours is recommended for maximum strength.
-
Advantages: High strength, resistant to temperature and chemicals.
Using Silicone Adhesive
:
-
Preparation: Ensure brick surfaces are clean and dry.
-
Application: Use a caulk gun to apply the adhesive.
-
Bonding: Press bricks together immediately after application.
-
Advantages: Flexible, withstands extreme weather conditions, no curing time required.
Techniques for Optimal Adhesive Application
:
-
Even Distribution: Ensure adhesive is applied evenly to prevent weak spots.
-
Controlled Pressure: Use consistent pressure when pressing bricks together to avoid gaps.
-
Environmental Conditions: Consider temperature and humidity as they can affect adhesive performance.
Combining Adhesives for Specialized Projects
:
-
Polyurethane and Epoxy: For projects requiring both flexibility and high strength.
-
Layering Techniques: Apply a base layer of one adhesive type and a top layer of another to utilize the strengths of both.
Maintenance of Tools and Equipment
:
-
Regular Cleaning: Ensure trowels, caulking guns, and other tools are clean to prevent contamination.
-
Proper Storage: Store adhesives according to manufacturer guidelines to maintain their efficacy.
Troubleshooting: Solutions to Common Brick Bonding Issues
When bonding bricks together, several common issues can arise, affecting the strength and stability of the masonry. Here’s a detailed look at these issues and their solutions:
Issue
Cause
Solution
Weak Walls
Improper bonding patterns or insufficient bonding agents
Utilize staggered or running bond patterns and ensure the use of strong bonding agents like mortar or specialized adhesives such as polyurethane, epoxy, or silicone.
Cracks
Environmental stress, thermal expansion, or incorrect adhesive application
Apply adhesive evenly and maintain consistent pressure. Use flexible adhesives like silicone to accommodate thermal expansion. Regularly inspect and repair any minor cracks promptly.
Potential Collapse
Poor bonding techniques or inadequate structural support
Follow proper bonding techniques, such as ensuring even distribution of adhesive and combining different types of adhesives for complex projects. Reinforce structures with appropriate support materials.
Adhesive Failure
Wrong adhesive choice or poor application
Select the right type of adhesive for the specific environmental conditions and project requirements. Maintain tools and equipment to ensure precise application.
Conclusion
Gluing bricks together has become a popular alternative to traditional mortar, offering a streamlined and efficient approach for both DIY enthusiasts and professional builders. This method simplifies the construction process, reducing the mess and complexity associated with mortar. By using specialized masonry adhesives, builders can achieve strong, lasting bonds that stand the test of time.
To glue bricks effectively, it’s essential to select a high-quality adhesive designed for masonry. Proper surface preparation is crucial; cleaning the bricks thoroughly removes dust and debris that could compromise adhesion. Applying an even layer of adhesive and carefully aligning the bricks ensures a strong bond, while allowing ample drying time solidifies the structure.
Comparing masonry glue to traditional mortar reveals distinct differences. Masonry glue, typically polyurethane-based, is ready-to-use and quick-drying, making it ideal for small repairs and decorative projects. However, it lacks the strength of mortar for load-bearing applications. Mortar, a mix of cement, sand, and water, requires precise mixing and longer curing times but offers superior durability for structural projects like walls and driveways.
In essence, gluing bricks is a practical solution for various projects, providing a clean, efficient, and durable alternative to mortar.
You may also like:
Allow sufficient curing time according to the manufacturer’s instructions. Typically, this ranges from 24 to 48 hours. Avoid disturbing the bricks during this period.
Finishing Touches
- Inspect the joints for any gaps or unevenness.
- Fill in any gaps with additional adhesive if needed.
- Smooth the surface with a damp cloth before the glue fully cures for a seamless finish.
Advanced Bricklaying Adhesive Techniques
Advanced bricklaying adhesive techniques involve selecting the appropriate adhesive type and applying it with precision to ensure a strong, durable bond between bricks. Here are some advanced methods:
Using Polyurethane Adhesive
:
- Preparation: Clean the bricks thoroughly to remove dust and debris.
- Application: Use a trowel or caulking gun to apply the adhesive.
- Bonding: Press bricks firmly together and allow 24 hours for curing.
- Advantages: Known for strength and durability.
Using Epoxy Adhesive
:
- Preparation: Ensure bricks are clean and moisture-free.
- Mixing: Combine the two components as per manufacturer’s instructions.
- Application: Apply the mixture with a trowel or caulking gun.
- Bonding: Press bricks together and allow to cure for 4-6 hours, although 24 hours is recommended for maximum strength.
- Advantages: High strength, resistant to temperature and chemicals.
Using Silicone Adhesive
:
- Preparation: Ensure brick surfaces are clean and dry.
- Application: Use a caulk gun to apply the adhesive.
- Bonding: Press bricks together immediately after application.
- Advantages: Flexible, withstands extreme weather conditions, no curing time required.
Techniques for Optimal Adhesive Application
:
- Even Distribution: Ensure adhesive is applied evenly to prevent weak spots.
- Controlled Pressure: Use consistent pressure when pressing bricks together to avoid gaps.
- Environmental Conditions: Consider temperature and humidity as they can affect adhesive performance.
Combining Adhesives for Specialized Projects
:
- Polyurethane and Epoxy: For projects requiring both flexibility and high strength.
- Layering Techniques: Apply a base layer of one adhesive type and a top layer of another to utilize the strengths of both.
Maintenance of Tools and Equipment
:
- Regular Cleaning: Ensure trowels, caulking guns, and other tools are clean to prevent contamination.
- Proper Storage: Store adhesives according to manufacturer guidelines to maintain their efficacy.
Troubleshooting: Solutions to Common Brick Bonding Issues
When bonding bricks together, several common issues can arise, affecting the strength and stability of the masonry. Here’s a detailed look at these issues and their solutions:
| Issue | Cause | Solution |
| Weak Walls | Improper bonding patterns or insufficient bonding agents | Utilize staggered or running bond patterns and ensure the use of strong bonding agents like mortar or specialized adhesives such as polyurethane, epoxy, or silicone. |
| Cracks | Environmental stress, thermal expansion, or incorrect adhesive application | Apply adhesive evenly and maintain consistent pressure. Use flexible adhesives like silicone to accommodate thermal expansion. Regularly inspect and repair any minor cracks promptly. |
| Potential Collapse | Poor bonding techniques or inadequate structural support | Follow proper bonding techniques, such as ensuring even distribution of adhesive and combining different types of adhesives for complex projects. Reinforce structures with appropriate support materials. |
| Adhesive Failure | Wrong adhesive choice or poor application | Select the right type of adhesive for the specific environmental conditions and project requirements. Maintain tools and equipment to ensure precise application. |
Conclusion
Gluing bricks together has become a popular alternative to traditional mortar, offering a streamlined and efficient approach for both DIY enthusiasts and professional builders. This method simplifies the construction process, reducing the mess and complexity associated with mortar. By using specialized masonry adhesives, builders can achieve strong, lasting bonds that stand the test of time.
To glue bricks effectively, it’s essential to select a high-quality adhesive designed for masonry. Proper surface preparation is crucial; cleaning the bricks thoroughly removes dust and debris that could compromise adhesion. Applying an even layer of adhesive and carefully aligning the bricks ensures a strong bond, while allowing ample drying time solidifies the structure.
Comparing masonry glue to traditional mortar reveals distinct differences. Masonry glue, typically polyurethane-based, is ready-to-use and quick-drying, making it ideal for small repairs and decorative projects. However, it lacks the strength of mortar for load-bearing applications. Mortar, a mix of cement, sand, and water, requires precise mixing and longer curing times but offers superior durability for structural projects like walls and driveways.
In essence, gluing bricks is a practical solution for various projects, providing a clean, efficient, and durable alternative to mortar.