Whether you’re crafting an outdoor kitchen, a cozy nook in your garden, or bringing an industrial-chic element into your living space, the question is – will Gorilla Glue rise to the challenge?
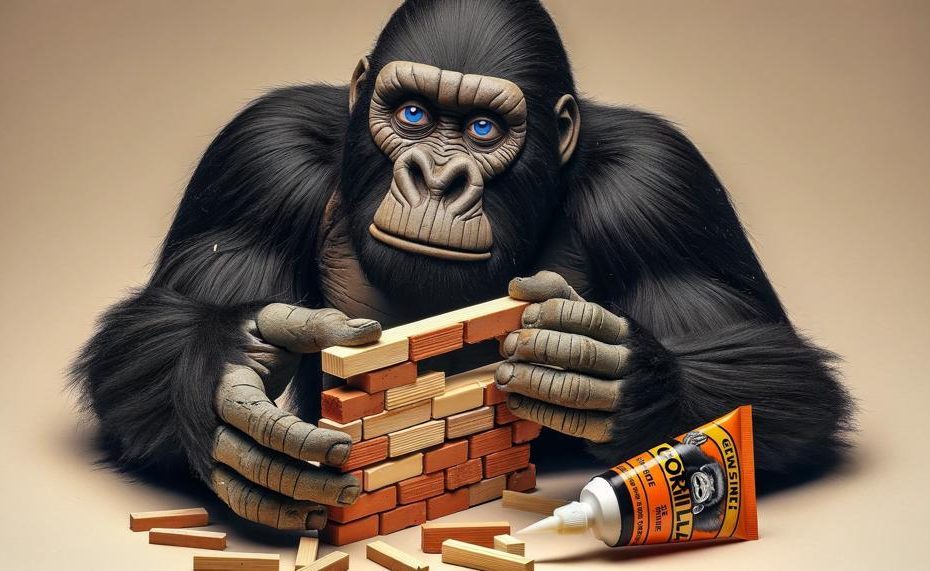
So, can gorilla glue stick wood to brick?
Yes, Gorilla Glue can stick wood to brick. Gorilla Glue is a polyurethane adhesive that can bond to many surfaces, including brick, wood, metal, and more. It’s water-resistant, but not waterproof, and can be used indoors or outdoors. When Gorilla Glue cures, it foams up and fills gaps.
Gorilla Glue can stick to rough, uneven surfaces like wood, stone, stucco, and plaster. It sets faster in warm conditions, and reacts to moisture. To help Gorilla Glue last longer, keep it in a dry place and try to exclude as much air as possible from the bottle.
So, let’s dive in now.
Table of Contents
What is Gorilla Glue?
Gorilla Glue is a renowned multi-purpose adhesive recognized for its incredible strength and versatility. It is engineered to bond dissimilar surfaces, ranging from wood and metal to ceramics and glass. The secret behind its robust bonding capability lies in its unique formulation.
When applied, Gorilla Glue undergoes a chemical reaction that causes it to expand and penetrate the microscopic crevices of the materials being joined, creating a powerful, intertwined bond.
Chemical Composition and Bonding Mechanism:
Gorilla Glue is a polyurethane-based adhesive, which means it consists of molecules that contain urethane (carbamate) links.
It reacts with moisture present in the air and on the surfaces of the materials to initiate a polymerization process.
This reaction not only makes the glue expand, filling in gaps, but also increases its sticking power.
Usage Instructions:
For a successful bond, follow these steps:
- Clean and dry the surfaces to be bonded.
- Apply Gorilla Glue sparingly, as it expands up to three times its size.
- Press the surfaces together tightly and leave undisturbed for at least 1-2 hours.
- Allow 24 hours for the glue to fully cure for maximum strength.
Suitable Conditions:
The environment plays a vital role in the setting process of Gorilla Glue:
- Humidity: A slightly damp surface can facilitate the glue’s curing process.
- Temperature: Follow the manufacturer’s guidelines, typically above 10°C (50°F).
Precautions:
- Be mindful of the expansion; too much glue can cause an overflow.
- Avoid skin contact and use gloves when handling.
Versatility and Applications:
| Material | Compatibility | Notes |
| Wood | Excellent | Moisture in wood helps curing. |
| Metal | Good | Surface should be clean of oil and dirt. |
| Glass | Good | Pre-clean for best results. |
| Ceramic | Excellent | May require longer curing time. |
| Plastic | Varies | Test on a small area first. |
The effectiveness of Gorilla Glue makes it a staple in DIY projects and repairs. Its formidable grip on uneven and porous surfaces like brick underscores its utility in both household and professional settings.
Surface of the Brick
Brick surfaces come with a naturally rough texture and a porous make-up, which are both a boon and a challenge when sticking wood to brick with Gorilla Glue. The coarse surface allows for more substantial mechanical adhesion as the glue can seep into the nooks and crannies, forming a tighter bond.
However, these same characteristics can lead to uneven glue distribution, which can compromise the bond strength if not addressed properly.
Preparation is Key
To guarantee a solid bond, it’s vital to prep the brick surface. Here’s a snapshot of the process:
| Step | Action | Reason |
| 1 | Clean the brick | Removes dust and debris |
| 2 | Dry thoroughly | Ensures no moisture interferes with adhesion |
| 3 | Apply Gorilla Glue evenly | Creates a strong, uniform bond |
Moisture and Other Factors
Bricks can soak up water and other substances due to their porosity, which might hinder the glue’s effectiveness.
It’s necessary to keep the brick dry and consider environmental factors like humidity and temperature, which can affect the drying time and ultimate bond strength.
Patience Pays Off
After applying Gorilla Glue, it’s essential to allow a full 24 hours for it to cure completely.
Rushing this process could weaken the bond, leaving your wood and brick connection less durable than desired.
Bearing the Elements
Once cured, the bond will be capable of withstanding various weather conditions, making Gorilla Glue a reliable choice for both indoor and outdoor projects involving brick and wood.
Expert Tip: For an extra firm bond, clamp the wood to the brick during the curing process. This ensures the wood stays flush against the uneven brick surface, allowing the glue to fill up the gaps effectively.
Cleaning the Brick Surface
To achieve the best adhesion when using Gorilla Glue on brick surfaces, a meticulous cleaning regimen is imperative.
Below is a table illustrating the recommended cleaning methods to prepare your brick surface:
| Step | Action | Notes |
|---|---|---|
| 1 | Remove Loose Debris | Use a stiff brush or broom to sweep away all loose particles. |
| 2 | Wash with Water | Rinse the brick surface with water to clear dust. |
| 3 | Apply Mild Detergent | For persistent spots, a gentle, soapy solution can lift stains. |
| 4 | Scrub Stubborn Grime | Employ a specialized brick cleaner for tenacious dirt. |
| 5 | Rinse Thoroughly | Ensure all cleaning agents are washed off to avoid reactions with the glue. |
| 6 | Let the Brick Dry | The surface must be completely dry before applying glue. Patience is a virtue here. |
| 7 | Roughen the Surface (Optional) | A light scuff with sandpaper can increase the grip for the glue. |
After following these detailed steps, your brick surface will be primed and ready for a firm wood to brick bond with Gorilla Glue. Ensure the cleaned area remains free from contact until the glue is applied to avoid re-contamination.
Moistening the Brick
When using Gorilla Glue to adhere wood to brick, a light dampening of the brick surface is beneficial. This moisture aids the glue’s curing process, as Gorilla Glue is a polyurethane adhesive that reacts with moisture to create a robust bond.
The key is to achieve a balance; the brick should be moist but not saturated. Let’s break down the effects of moisture on the adhesive bond.
- Surface Preparation: Ensuring the brick is void of loose particles and dust is essential. Clean the brick with a brush or cloth before introducing any moisture.
- Moisture Application: A light misting of water on the brick is adequate. This slight dampness facilitates the glue’s expansion into the brick’s pores, establishing a firmer grip.
- Bond Formation: The moisture kick-starts the chemical reaction necessary for Gorilla Glue to cure and solidify, thereby improving the bond between wood and brick.
Here is an illustrative table showing the right balance of moisture for optimal bonding:
| Condition | Bonding Strength | Recommendation |
| Dry Brick | Weak | Lightly moisten for improved adhesion |
| Appropriately Moist Brick | Strong | Ideal state for glue application |
| Oversaturated Brick | Weak | Avoid too much water, as it can dilute the glue |
Crucial Considerations:
- Temperature and Humidity: These elements can affect drying time and bond strength. Warmer, drier conditions may speed up the curing process.
- Curing Time: Patience ensures the strongest bond. Don’t rush the process; allow ample time for the glue to set.
- Application Precision: A damp surface provides the added advantage of slightly longer open time, which allows for careful placement and adjustments.
Remember, a damp brick can turn a good bond into a great one, but an overly wet brick can lead to a bond that’s less reliable than a fair-weather friend.
Applying Gorilla Glue
To ensure a strong bond between wood and brick with Gorilla Wood Glue, follow these detailed instructions:
Preparation:
- Clean Surfaces: Both the wood and brick must be free from dust, grease, and any other debris. Give them a good brush and, if needed, a wipe with a damp cloth.
- Moisture Content: Dampen the brick slightly with a sponge or spray bottle. Wood should be naturally dry unless the environment is arid, in which case lightly moisten the wood as well.
- Fit Test: Ensure that the wood fits snugly against the brick surface. Any gaps will weaken the bond.
Application Process:
Apply the Glue:
Spread a thin, even layer of Gorilla Wood Glue over the wood surface that will adhere to the brick. Use a scraper or your finger (with gloves) to ensure it’s spread evenly.
Press Together:
Firmly press the wood against the brick immediately after applying the glue.
Clamp:
Use clamps or heavy objects to apply pressure to the wood, ensuring it stays in contact with the brick while the glue sets.
Cure Time:
Allow the glue to cure for a minimum of 24 hours before removing the clamps or weights.
Post-Application:
Cleanup:
Remove any excess glue with a damp cloth before it dries. Once cured, it can be scraped off or sanded down.
Storage:
Keep the Gorilla Wood Glue bottle sealed tight and stored in a cool, dry place to maintain its shelf life.
Tips for a Stronger Bond:
- Avoid applying too much glue which can prevent proper curing and weaken the bond.
- Do not disturb the joint while the glue is curing.
- Ensure the room temperature is above 13°C for optimal curing conditions.
Clamps or Pressure
When bonding wood to brick with Gorilla Glue, clamps or pressure are not just helpful; they’re pivotal. Gorilla Glue reacts to pressure by expanding into the materials’ pores, which enhances the adhesive’s grip, ensuring a steadfast bond.
Step-by-Step Guide
| Step | Action | Reason |
| Clean Surfaces | Gently sand the brick, wipe wood with a damp cloth. | Clean contact points ensure the glue adheres solidly. |
| Apply Gorilla Glue | Spread a modest amount on the wood. | Expanding adhesive needs minimal application to work. |
| Position and Apply Pressure | Press wood against brick, apply clamps or weight. | Pressure causes glue to expand into materials, creating a robust bond. |
| Wait for Curing | Leave under pressure for at least 24 hours. | Gives glue ample time to set and strengthen the bond. |
Tips for Effective Clamping
- Distribute clamps evenly across the wood’s surface to avoid gaps.
- Tighten clamps to a firm hold but avoid over-tightening, which might cause glue to ooze out.
- If clamps aren’t an option, stack weighty items like books or bricks atop the wood to apply steady pressure.
Surface Contact Matters
Ensure full contact between wood and brick; any voids could weaken the bond. Spot gaps? Slather a bit more glue and reapply pressure. Remember, it’s not about drowning the material in glue but getting it just right.
By employing clamps or weights to exert pressure, you’re essentially coaxing the glue into a stronger bond, one that’s tough enough to withstand the elements and time.
Drying Time and Instructions
When it comes to sticking wood to brick with Gorilla Glue, patience isn’t just a virtue; it’s a necessity. Here’s the skinny on how long you should expect to twiddle your thumbs while waiting for that bond to set.
| Stage | Time | Action |
| Initial Bond Formation | 10-15 minutes | Apply pressure or clamp |
| Clamp Time | At least 1 hour | Maintain even pressure |
| Full Cure | 24 hours | Let sit undisturbed |
Don’t skimp on the clamping, and make sure you’ve got an even spread of that sticky stuff. Remember, it’s not a race; it’s more like a slow dance between materials.
Durable Bond of Gorilla Glue
The durable bond of Gorilla Glue makes it particularly suitable for adhering wood to brick due to its robust adhesive properties which are tailored to handle the demands of bonding porous, uneven surfaces. Let’s break down why it’s the go-to for many builders and DIY enthusiasts:
| Property | Benefit | Outcome |
| Deep Penetration | Locks into brick pores | Enhanced grip |
| Weather Resistant | Stands up to elements | Longevity outdoors |
| Surface Prep Importance | Maximizes bond strength | Reliable adhesion |
Patience is key with Gorilla Glue. A 24-hour cure time might seem a stretch, but it’s a small wait for a bond that’s built to last. It’s a smashing choice for those projects where you need a mighty, enduring hold.
Conclusion
As we get to the end of this thorough tutorial, it’s clear that, with the correct procedures followed, Gorilla Glue can really forge a strong connection between brick and wood. This polyurethane glue is scientifically remarkable because it can extend and penetrate both the fibrous consistency of wood and the porous surfaces of bricks, providing an interlocking grip that is difficult to break.
This article’s exploration of the science, use, and practical results of gorilla glue emphasizes how crucial surface preparation and ambient factors are. Success is yours if you clean the brick, make sure it dries, and apply the adhesive evenly. Furthermore, the brick surface’s mild dampening facilitates the chemical reaction that gives Gorilla Glue its ideal bonding strength.
You’ll be able to take on your DIY tasks with confidence if you keep in mind the provided tips and tactics. Strong, long-lasting bonds between wood and brick are mostly the result of careful cleaning, accurate application, and patience throughout the complete curing process. Gorilla Glue is a trustworthy construction companion, whether you’re remodeling your outside area or giving your house an industrial touch.