Yes, you can glue your glasses together. It’s a quick and cost-effective solution, especially when you’re in a pinch. However, it’s crucial to understand that gluing your glasses is typically a temporary fix and requires some preparation for the best results. Here’s a quick guide to help you decide if this DIY approach is right for you and how to do it effectively.
- Adhesive Choice Matters: Opt for super glue (cyanoacrylate adhesive) for a quick fix, but for a more durable solution, epoxy resin is your best bet.
- Preparation is Key: Clean the broken surfaces thoroughly to ensure a strong bond.
- Application Tips: Apply the adhesive carefully, following the manufacturer’s instructions to avoid making a mess or gluing parts together unintentionally.
- Test the Repair: After the glue has set, gently flex or wiggle the glasses to ensure the bond holds.
- Professional Repairs for Major Damage: For severe breaks or damaged lenses, a professional repair is recommended to avoid further damage.
- Material Considerations: Different materials require different adhesives, so check what your glasses are made of.
- Warranty Warning: DIY repairs might void your warranty, so check your coverage before proceeding.
By following these tips, you can extend the life of your glasses until you can get a more permanent fix. So, while gluing your glasses can be a handy temporary measure, it’s essential to proceed with care to ensure a secure and lasting repair.
Table of Contents
- 1 How to glue glasses together
- 2 Choose the right type of glue for your task
- 3 Clean the glasses with soap and warm water
- 4 Apply a thin layer of glue on one glass
- 5 Press the two pieces together
- 6 Clean the glasses with soap and warm water
- 7 Apply a thin layer of glue on one glass
- 8 Press the two pieces together
- 9 Conclusion
How to glue glasses together
Gluing glasses together demands careful preparation and precise execution to ensure a strong, lasting bond. Here are the detailed steps:
| Step | Description | Materials |
| Choose the Right Adhesive | Pick between super glue for quick fixes and epoxy resin for durability. | Super glue, Epoxy resin |
| Prepare the Glass Pieces | Clean and ensure the pieces fit well together. | Soap solution, Cloth |
| Apply the Adhesive | Apply a thin layer of adhesive and press pieces together. | Clear glass glue, Clamps (optional) |
| Secure and Cure | Clamp the pieces if needed and allow curing as per instructions. | Clamps, Timer |
| Testing and Final Touches | Check the bond’s strength and clean excess adhesive. | Blade, Solvent |
| Maintenance Tips | Avoid extreme conditions to maintain bond strength. | N/A |
For further detailed information, refer to this guide on glass adhesives on Wikipedia.
Choose the right type of glue for your task
Choosing the right type of glue for repairing your glasses hinges on the materials of your frames and the nature of the damage. Here’s a detailed guide to help you make the right choice:
| Type of Glue | Best For | Notes |
| Super Glue (Cyanoacrylate) | Quick fixes on plastic and metal frames | Dries fast and clear; handle with care to avoid skin contact. Provides a strong, but sometimes brittle bond. |
| Epoxy | Metal frames and mixed materials | Creates a very strong, durable bond; typically involves mixing two components before application. Longer setting time. |
| UV Resin | Plastic and acetate frames | Requires a UV light to cure; offers a very clear and precise bond. Ideal for invisible repairs. |
| Polystyrene Cement | Plastic frames | Works by melting the plastic slightly to create a weld; not suitable for all types of plastic. |
| Silicone Adhesive | Nose pads and flexible parts | Remains flexible after curing; ideal for parts that need a bit of give. Waterproof and durable. |
How to Choose the Right Glue
- Identify Frame Material: Determine if your glasses are made of plastic, metal, or a combination of materials.
- Consider the Damage: For quick fixes, super glue is handy, but for a long-lasting repair, epoxy or UV resin might be better.
- Clear Drying: Opt for adhesives that dry clear to maintain the aesthetic of your glasses.
- Ease of Use: Super glue and silicone adhesives are straightforward, while epoxy and UV resin require more preparation.
In any case, remember that repairing glasses at home is a temporary fix.
Clean the glasses with soap and warm water
The best method for cleaning glasses with soap and warm water to ensure they are properly glued together involves a meticulous yet straightforward process. Follow these steps to keep your glasses spotless and intact:
- Prepare the Materials: Gather mild liquid soap and warm water. Avoid harsh chemicals or abrasive cleaners.
- Rinse the Glasses: Hold the glasses under a gentle stream of lukewarm water. This initial rinse removes loose dirt and debris, preventing scratches during cleaning.
- Apply Soap: Apply a small drop of liquid soap to each lens. Using your fingertips, gently rub the soap in circular motions across the lenses, frames, and nose pads.
- Clean Thoroughly: Pay special attention to the areas where the lenses meet the frames. Ensure that the soap reaches these crevices to remove any hidden grime.
- Rinse Again: Rinse the glasses under running warm water, ensuring all soap residue is washed away. Soap residue can cause smudges and affect visibility if not completely removed.
- Check the Glue: While rinsing, check that the glued areas remain secure. The gentle water flow helps avoid loosening the glue, unlike a high-pressure stream which can weaken the bond.
- Dry with a Microfiber Cloth: Use a clean, lint-free microfiber cloth to dry the glasses. Avoid using paper towels or clothing, as they can leave scratches.
- Inspect for Residue: Inspect the glasses for any soap residue. If found, repeat the rinsing process.
Apply a thin layer of glue on one glass
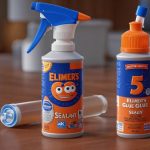
When it comes to bonding two glass surfaces together, it is crucial to use a high-quality glue that is specifically designed for glass. After researching and comparing different options, Loctite Super Glue Glass stands out as the best choice for this purpose.
This super glue is specifically formulated to bond glass to glass or glass to metal. It dries transparent and leaves invisible bonds, making it suitable for tinted, stained, and crystal glass. Plus, it is water and dishwasher resistant, ensuring a long-lasting hold.
To ensure the best results when using Loctite Super Glue Glass, it is important to follow the proper application process. First, open the glue according to package instructions and apply a small amount onto one of the surfaces being fixed. Take care not to use too much glue as it can overflow and create a messy bond.
Next, carefully press the glass pieces together with precision and hold them firmly for 60 seconds until the bond sets. Keep in mind that cure times may vary, so be sure to check the package instructions for specific guidelines. Once the bond has fully cured, you can use the glass again.
In case any excess glue spills out during the bonding process, it can be easily wiped away with a damp cloth or removed with a box cutter if already dried. However, take caution when working with delicate glass to avoid scratching or damaging its surface.
Press the two pieces together
Hold the glasses together firmly for at least 60 seconds. This ensures that the adhesive properly sets and creates a strong bond. After this initial hold, allow the glued pieces to remain undisturbed for at least 24 hours to achieve full strength.
Here’s a simple guide to follow:
| Step | Action | Duration |
| 1 | Press the two glass pieces together | Immediate |
| 2 | Hold firmly | 60 seconds |
| 3 | Leave undisturbed | 24 hours |
Ensuring a firm hold for 60 seconds helps the glue to set initially, while leaving it undisturbed for 24 hours allows the bond to fully cure, providing maximum strength and durability.
Clean the glasses with soap and warm water
To properly clean your glasses with soap and warm water without causing any damage, follow these detailed steps:
- Wet the Glasses: Start by rinsing your glasses under lukewarm water. This helps remove dust and debris that might scratch the lenses during cleaning.
- Apply Soap: Place a drop of dishwashing liquid, free from lotions, on each lens. Using your fingertips, gently rub the lenses and frame. Pay extra attention to areas that come into contact with your skin, such as the nose pads and temples.
- Rinse Thoroughly: Rinse the glasses under running water to wash away all the soap. Ensure no soap residue remains, as this can cause streaking.
- Dry with a Microfibre Cloth: Use a clean microfibre cloth to dry your glasses. Avoid using paper towels or clothing, as these can scratch the lenses.
- Inspect and Repeat if Necessary: Check your glasses for any remaining smudges or soap residues. If needed, repeat the process.
Apply a thin layer of glue on one glass
To apply a thin layer of glue on one glass when trying to repair your glasses, follow these precise steps:
- Select the Right Glue: Use specialized glass glue designed for clarity and strong bonding, such as epoxy or cyanoacrylate (super glue).
- Prepare the Surface: Clean the glass thoroughly with a mild, lotion-free dishwashing liquid and lukewarm water. Dry it with a microfibre cloth to ensure there is no residue or dust.
- Apply the Glue:
- Squeeze a small amount of glue onto a piece of scrap paper or directly onto a fine-tip applicator.
- Using the applicator or a toothpick, dab a tiny amount of glue and spread it thinly across one of the glass surfaces.
- Ensure the glue is spread evenly and sparingly to avoid excess and mess.
- Join the Pieces:
- Align the broken pieces accurately before pressing them together.
- Press firmly but gently to avoid creating air bubbles and to ensure a smooth bond.
- Allow to Dry:
- Let the glued glasses sit undisturbed for the recommended drying time as specified on the glue’s packaging.
Press the two pieces together
When pressing the two pieces of glass together to ensure a strong and secure bond, apply gentle yet firm pressure. This approach is crucial to avoid damaging the glass while ensuring a robust connection.
Key Points for Pressing Glass Together:
| Action | Details | Notes |
| Align the Pieces | Make sure the glass pieces are perfectly aligned before pressing. | This helps in achieving a clear and seamless bond. |
| Apply Gentle Pressure | Press the pieces together with a steady and even force. | Avoid excessive force to prevent breakage. |
| Use Clear Glass Glue | Apply a thin bead of glue on one edge. | Ensures optimal clarity and minimal visibility of the glue. |
| Firm and Even Press | Ensure the pressure is evenly distributed across the glass surface. | This helps avoid air bubbles and ensures a uniform bond. |
Conclusion
In conclusion, gluing your glasses together can be a convenient and cost-effective solution for minor repairs.
However, it is important to choose the right adhesive and prepare the broken surfaces properly for the best results. It is also crucial to test the repair and consider professional help for major damage.
Additionally, be mindful of your glasses’ materials and warranty before attempting any DIY repairs. By following these steps carefully, you can extend the life of your glasses until you can get a more permanent fix.
Ultimately, while gluing your glasses may be a quick fix, it’s always best to consult a professional for long-lasting repairs or replacements.